Monday 31 May 2010

Fabric Canvas


I recently made a bigger version of it, with a few twists.


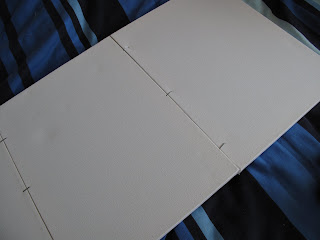
I didn't have a canvas that was big enough for what I wanted, so I made one big canvas out of three small canvases. I stapled them together down the middles, and did a few on the fronts of the canvases to stop them from bowing out.


The staples I put in are down the centre.


Put some on the front of the canvases, too.


Then, I cut a piece of fabric bigger than the canvases. I added about two inches around the edges. It is best to iron your fabric first.


Then I started stapling the fabric down. Start at the middle and work your way out; pulling the fabric very tight to prevent wrinkles. Leave the corners until last.


This is how I finish off the corners. You may need to cut off some of the fabric to get it neat and tidy.


Then, admire your beautiful new artwork that took ten minutes, and was practically free because you already had everything needed to make it!


 The DIY Show Off

Check out the DIY Show Off Project Parade for more ideas!


CreativeShareWednesdays

Wednesday 26 May 2010

Silk Grocery Bag Holder

Do you remember the grocery bag tutorial I did?

Recently, I made another bag holder to give to someone.


I did it the same way as the tutorial, but made it bigger, and with silk fabric.


If you've ever worked with silk, you probably just groaned and decided that I must just have immense determination and sewing skills!

Don't despair! There is a way to make working with silk a lot easier.


Line it!
To do that, I cut out the silk fabric, and then cut some cream cotton to exactly the same size. I then zig-zagged the two fabrics together, and followed the tutorial.

By zig-zagging cotton fabric to the silk, it helps the silk to go through your machine better and it won't fray as much. 


Go on, experiment with silk!


Monday 24 May 2010

Easy Gingerbread Recipe!


Have you ever wanted to try a really simple gingerbread recipe?


Just make sure you do the right simple recipe... unlike the time when I... *ahem* was trying to impress my friends by baking for them and used the wrong recipe. My gingerbread mix shamefully ended in the bin, and I bought them some from the supermarket!

Pride goes before a fall, much?

Please say I'm not the only one!

:)

Anyway, here's the easy gingerbread recipe that does work!

12 oz plain flour
4 oz butter
2 teaspoons ground ginger
1 teaspoon bicarbonate of soda
1 beaten egg
3 oz soft brown sugar
4 tablespoons golden syrup
Currants, chocolate, smarties etc. for decorating

1. Put the butter, sugar, and syrup into a saucepan and stir together on a low heat until melted.

2. Sieve the plain flour, ground ginger, and bicarbonate of soda into a mixing bowl.

3. Add the butter, sugar, and syrup mix, along with the beaten egg.

4. Mix together and knead into a ball.

5. Chill the dough in a plastic bag in the fridge for 30 minutes.

6. Roll out the dough to about 1/4 inch thickness.

7. Cut your gingerbread men out and put on a greased baking tray. Decorate them with currants, smarties, etc.

8. Bake for 10-15 minutes at 190º C (375ºF or gas mark 5) When you take them out of the oven, immediately put them onto a cooling rack.

9. Add icing when cooled if desired. 

10. Enjoy your gingerbread men!


Yum.

:)


Friday 21 May 2010

Beachy Look Painted Jewellery Box


Have you ever seen paint effects like this and wondered how to do it?


You probably thought it required a lot of skill; I know I did!


However, it is surprisingly easy.

I met up with some of our home-schooling friends to do arts and crafts. One of the mums had bought these jewellery boxes from Yellow Moon for us to paint.

I choose to do a beach look for mine!


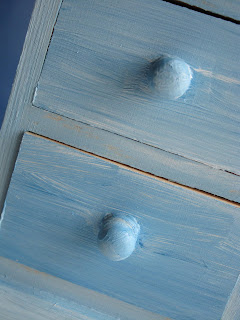
All I did was painted white acrylic on, and then straight away applied a light blue layer.  I had mixed a dark blue with more white to get the light blue I wanted. The colours mix and form the beachy look.

The most important thing is to keep the brush strokes the same way!
I applied the paint from side to side on the front and top, and up and down on the sides.
Follow whichever way the wood grain is going; this will give you the best results.


Then you can have a beautiful box to store jewellery, or buttons like me!

Have a great weekend!


Monday 17 May 2010

I'm still alive!


Sorry it's been ages since I've last posted; I've been reeaally busy!
Amongst many other things, I've been baking lots of cakes. 
Cake decorating is a new hobby of mine!


This big french fancy cake will probably only make sense if you're a Brit - check out this link!
They're very popular bite-size cakes.


I made this flowery one to try out a new technique.


My brother's football team got into their league's final, so I made him a cake to celebrate.


The day before, my Grandparents had their 55th wedding anniversary!


Then I made these cakes for our Church's senior citizens group.


These last three photos show some of the cakes I made for my Church's youth group!

Onto other news...

A few weeks ago, I showed you how to make a raised bed for your veggies.
One reader asked me to show a photo of the vegetables when they had germinated.
Brianna, this is for you!

The middle row is salad lettuce, and the two outside rows are carrots. A raised bed is perfect for carrots, as they require lots of space for the roots to go deep down. Salad lettuce grows very quick, so it's a perfect partner for carrots as the plants don't take up much space.


Are you wondering why they've not got munched on by slugs and snails?

Simple. We found a perspex 'window' to put over the raised bed.


It's an easy way to keep them at bay!


Wednesday 5 May 2010

Spray Painted Chair


If you've been looking at my blog last night, you might have noticed lots of changes, disappearing and reappearing posts, etc. Sorry for any disturbance! 

I've just been sorting things out so that you can search for the tutorials easier.


Now, all sewing tutorials are on one page, click here to see it!

DIY tutorials are on one page, click here to see it!

Card-making tutorials are on one page, click here to see it!

Quick and cute tutorials are on one page, click here to see it!


Hopefully that will make it easier for you to find them. :)

Onto my spray painting project!

For years and years we've had a chair that I loved, but it's green colour doesn't really go with the lilac and white colour scheme in my room

So, I spray-painted it white. And I didn't use any old white, oh no. Heirloom White. If you read DIY blogs, you will know exactly what colour I'm on about.  I didn't know we even had Rustoleum Heirloom White spray paint in Britain, but we do! As I'd heard so much about this famous colour, I thought I'd give it a go.
Following advice from one of my favourite blogger, and comments on this post, I bought some white primer and the Heirloom White spray paint. Both were 400ml cans.

I applied the primer, following the directions on the can. I then left it to dry for twenty minutes.


Then, I applied the Heirloom White paint. I love the colour of it! It's in between white and cream; absolutely perfect for my room's colour scheme!


Now this chair resides in my room, and holds my lovely new plant.That is great, because my plant can't stay on my windowsill all day because it prefers partial shade, not full sun.
From a decorating and design perspective, the chair is brilliant because it fills up a corner of a small room without being overpowering, and it ties in perfectly with the colour scheme.

Every time I look at it, I smile!


A chair probably isn't the easiest first spray paint project, with all the little bits, etc., but I did it and was really pleased with the results! At the same time, I also painted something else, but that's another post!


Monday 3 May 2010

GIVEAWAY winner!

Are you excited?
Every time I load up random.org to find out who's won the giveaway, my heart beats a bit faster!

Anyway, I will not keep you in suspense any longer!

The winner is....


Commenter #5 who said...


Congratulations James and Kelsey!

The buttons will be sent to you very soon.

:)

Have you ever wondered why I have giveaways on this blog?

I am a Christian, believing that Jesus came into the world to die to take away my sins. He rose again victorious over death, and can give us eternal life if we trust in Him to save us from our sins. This is the greatest gift EVER! I like to show my thankfulness to Him by giving things away to you guys. :D

You might have heard the Bible verse "It is more blessed to give than to receive" (Acts 20 v 35) I believe that's true because I am blessed and very happy when I give things away! Hopefully the receiver is, too. :) It also helps me to show them God's love to each and everyone of us. :)

Also, when I die, I want to remembered as a very generous person! I love giving away, please don't ever be shy about entering my giveaways. :D

And... the great thing is that as my blog expands and gets bigger, more people have a chance of winning! In the first giveaway, there were 4 comments, the second giveaway had 6 comments, the third giveaway had 9 comments, and this one had 12. We're growing, people!


Let's end with a photo of James and Kelsey's prize:


Check back soon for my first spray paint project!

:)